Saturday, October 31, 2009

November Ribbon Share

It is time for another ribbon share! This month I am offering up a share of all the new ribbon in the Holiday Mini Catalog! In the share you will get 2 yards of the Sleigh Bells ribbon, 5 yards each of the Gold and Silver Elastic Cord, and 3 yards each of the Mistletoe Ribbon Originals, all for just $12! Don't miss this share! Contact me to place your order or use the button below!

Holiday Mini Ribbon Share

To Order Stampin' Up! Products On-Line 24/7, CLICK HERE!


Friday, October 30, 2009

Trick or Treat!

Today I have one last Halloween project for you. I made this card to send to my brother and his girlfriend. I was inspired by this card here. I just love the Little Boo stamp. Isn't it cute? It is from the under $10 section of the catalog and is a bargain at $6.95!

Ingredients:
  • Little Boo and Holiday Best (hostess) stamp sets
  • Cast-a-Spell Designer Series Paper
  • Very Vanilla and Basic Black card stock
  • Basic Black ink
  • Basic Black, Pumpkin Pie, and Old Olive markers
  • Basic Black 5/8" Grosgrain Ribbon
  • Silver Cord (retired)
  • 1/16", 1 1/4", and 1 3/8" Circle punches
  • Stampin' Dimensionals

To Order Stampin' Up! Products On-Line 24/7, CLICK HERE!

Thursday, October 29, 2009

October Demonstrator Swap

Today I wanted to share with you all the cards from our monthly demonstrator swap. It was Kim's turn to pick this month. We had to create a card using the layout below and any current Halloween set.

Here is my card. I used both the From the Crypt and Graveyard Gala stamp sets. I also used the Spooky Treats rub ons and Cast-a-Spell designer paper.

Here is Kim's card. I love the white craft ink on the black card stock. Super cute!

Here is Merrigrace's card. She used My Digital Studio to create her "stamped" images!


Here is my mom's card (it was her first swap!)

No card from Lenore this month yet, but then again she just had her baby last Friday, so I guess we should give her a break! Ha ha. :)


Tuesday, October 27, 2009

1st Annual Christmas Card Class

Over the weekend I held my first annual Stampin' Up! Christmas Card Class. We made 3o different Christmas cards and 2 6x6 scrapbook pages. To make these cards, we used a half of the Christmas Jingle Simply Scrappin' Kit, some ribbon, and stamps to create 30 card fronts and the 2 scrapbook pages. Next we mounted all the card fronts to Very Vanilla card bases. And that's it! We were done! Super easy and super fast! See below for pictures of all the cards.


Ingredients:
  • Christmas Jingle Simply Scrappin' Kit (1/2 kit used per person)
  • Very Vanilla card stock (15 8 1/2" x 11" sheets cut in half per person)
  • Real Red, Chocolate Chip, and Old Olive 5/8" grosgrain ribbon
  • Chocolate Chip and Old Olive Classic Ink
  • Many Merry Messages, Sincere Salutations, and All Holiday's stamp sets
  • Wide Oval punch

Monday, October 26, 2009

Final Deals of the Week!

This weeks Deals of the Week are our two party kits. Check them out below and contact me to place your order!

The final deals of the week are from October 26, 10 AM (MT) through October 31, 11:50 PM (MT).


Item

Page

Description

Regular Price

Special Price

116214

174

Princess Party Kit

$15.95

$9.99

116213

175

Pirate Party Kit

$15.95

$9.99


To Order Stampin' Up! Products On-Line 24/7, CLICK HERE!


Friday, October 23, 2009

Halloween Tree

When I went to convention back in August, there was the coolest Halloween tree on display in one of the display booths. When I saw it I knew that I wanted to create my own when I got home. Well, I found the cutest little black tree at the craft store so I bought it just for this purpose! I made for spooky ornaments for my little tree.


Here is a close up of each of them:


To create these I used the Cast-a-Spell Designer Paper, Spooky Treats Rub Ons, and the From the Crypt stamp set. I also added some black chunky glitter to them as well. To hang them I simply added some Basic Black grosgrain ribbon. Here is the finished tree.


I think it turned out cute. And since it is small, I actually have room to display amungst my many other Halloween decorations!

Thursday, October 22, 2009

My Digital Studio Scrapbook Pages

Today I wanted to share with you some scrapbook pages I made using My Digital Studio. Personally I like traditional scrapbook pages with their multiple textures and embellishments. I wasn't sure if I would like digital scrapbooking or not, but I decided to give a try anyway. First, here is a 12x12 page I created in My Digital Studio:

I created this page from scratch (I did not use one of the predesigned templates). This took practically no time at all to create. I had it printed out and even though it looks great, I still wanted to add some real embellishments to it. So, I added some Kraft Taffeta ribbon and a Kraft Corduroy button. Here is a picture of my completed page. What do you think? I am very happy with the way it turned out.

Next I created a 8 1/2 x 11 page in MDS. For this one I used one of the photo only templates and simply dragged and dropped my photos into it. Then I just added my paper, stamps, and journaling in MDS and I was done.

I had this one printed out as well, but again, wanted to add some real embellishments. So, since I usually scrapbook 12x12 pages, I mounted my MDS page to a coordinating piece of Night of Navy textured 12x12 card stock. Since I used Night of Navy for my stamps and journaling in MDS, it matched perfectly. Next I added some buttons, a clip, and some ribbon to my page. Here is the finished product. Again this was super easy (and fun) to create!


So, I have to admit that I like digital scrapbooking! Mainly because it is easy, but also because my pages don't have to be completely digital. I can easily add real embellishments to my pages to make them more traditional. And because it is Stampin' Up! everything will coordinate and all my colors will match perfectly!
To learn more about the My Digital Studio application, click here. Click here to see all the stamp sets that you have access to with My Digital Studio. Contact me to get your own copy of My Digital Studio.

Wednesday, October 21, 2009

My Digital Studio Stamping

Today I wanted to share with you another use for My Digital Studio. Since the application comes loaded with dozens of Stampin' Up! stamp sets, you can easily use one of the digital stamps in place of an actual stamp for your project. Below is the thank you card I made for my daughter's birthday party. For the elephant, I used the Nursery Necessities stamp set.


Now, lets say that I wanted to make this card, but did not have the Nursery Necessities set, but I did have My Digital Studio. I could easily create the elephant stamp by "stamping" the elephant in My Digital Studio, changing the color, and printing it out. To demonstrate, here are some elephants I stamped in My Digital Studio. I stamped 3 elephants, changed their color to Pretty in Pink, and then resized the last two. Next, I simply printed them out on Whisper White card stock using my home printer.


Since I did not resize the first elephant, he printed out true to size, which means that the printed image is the exact same size as the real stamp! I created the resized elephants just to demonstrate the flexibility of My Digital Studio. Next, I simply cut out the first elephant and adhered it to my card. Here is the exact same card, made the exact same way as the one above, only I used my printed elephant instead of the stamped elephant.


Isn't that cool? So, the bottom line is that with My Digital Studio, you not only have all the capabilities that I have pointed out before, but you also have a full library of digital stamps that are exactly like our exclusive stamp sets at your fingertips - and at a fraction of the cost! To learn more about the My Digital Studio application, click here. Click here to see all the stamp sets that you have access to with My Digital Studio.


To Order Stampin' Up! Products On-Line 24/7, CLICK HERE!


Tuesday, October 20, 2009

More My Digital Studio Cards

As promised, I am back today with some more My Digital Studio card samples. First, here is the card image I made in My Digital Studio. I didn't use a pre-designed template for this one. I "stamped" the images you see below and added "card stock" to the bottom of the card.
Next, I printed two copies on my home printer on Whisper White card stock. On the first one, I simply added some Tempting Turquoise grosgrain ribbon and I was done.


For the second one, I cut out the image, add the ribbon, and mounted it on a piece More Mustard card stock to create a little different look.


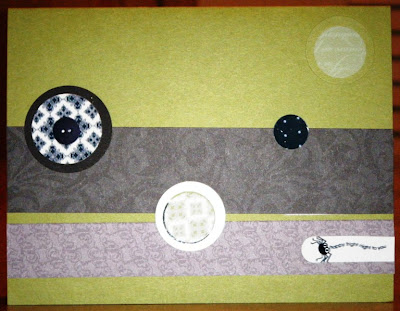
Again, creating these cards was super easy with My Digital Studio. I like how it allowed to enlarge the brocade flourish stamp image from the Friends 24/7 set. I really like how it turned out! For more information on My Digital Studio, click here.


To Order Stampin' Up! Products On-Line 24/7, CLICK HERE!

Monday, October 19, 2009

Deals of the Week!

This weeks Deals of the Week are an assortment of embellishments. Check them out below and contact me to place your order!

The third deals of the week are from October 19, 10 AM (MT) through October 26, 9:50 AM (MT).


Item

Page

Description

Regular Price

Special Price

114348

179

Basic Jumbo grommets

$6.95

$4.49

109857

179

Mini Library clips

$12.95

$8.99

112571

179

Circle Designer brads

$5.95

$3.99

112581

179

1/2" Library clips

$6.95

$3.99


My Digital Studio Cards

Hi all. Today I wanted to share with you some cards I made with My Digital Studio. First, here is a super quick Christmas card that made using one of the pre-designed templates. I did nothing additional to this card. I simply selected the template and had it printed! Can't get much easier than that!


I had the card printed using Stampin' Up!s new printing service and not only did it arrive in no time flat, but it is super high quality and looks great!


Next here is another card I put to together using one of the pre-designed templates in MDS. However on this one, I removed some of the embellishments that were on it because I wanted to add real embellishments to it once it was printed. So her is the images from MDS:


I then printed it on my home printer on Whisper White card stock. Then I simply added some Regal Rose wide grosgrain ribbon and here is the end product:


Bottom line - using the pre-designed card templates in MDS is a super quick (and fun!) way to create a card by simply using as is, or adding to it once it is printed! This is a great idea when you have a lot of cards to make and little time. To learn more about the My Digital Studio application, click here. I have some more cards to show you using MDS, so stay tuned!

To Order Stampin' Up! Products On-Line 24/7, CLICK HERE!